Chevy Impala Detailing: Stunning Deep Cleaning & Moss Removal (Part 1)
The Chevy Impala: A Classic Worth Restoring
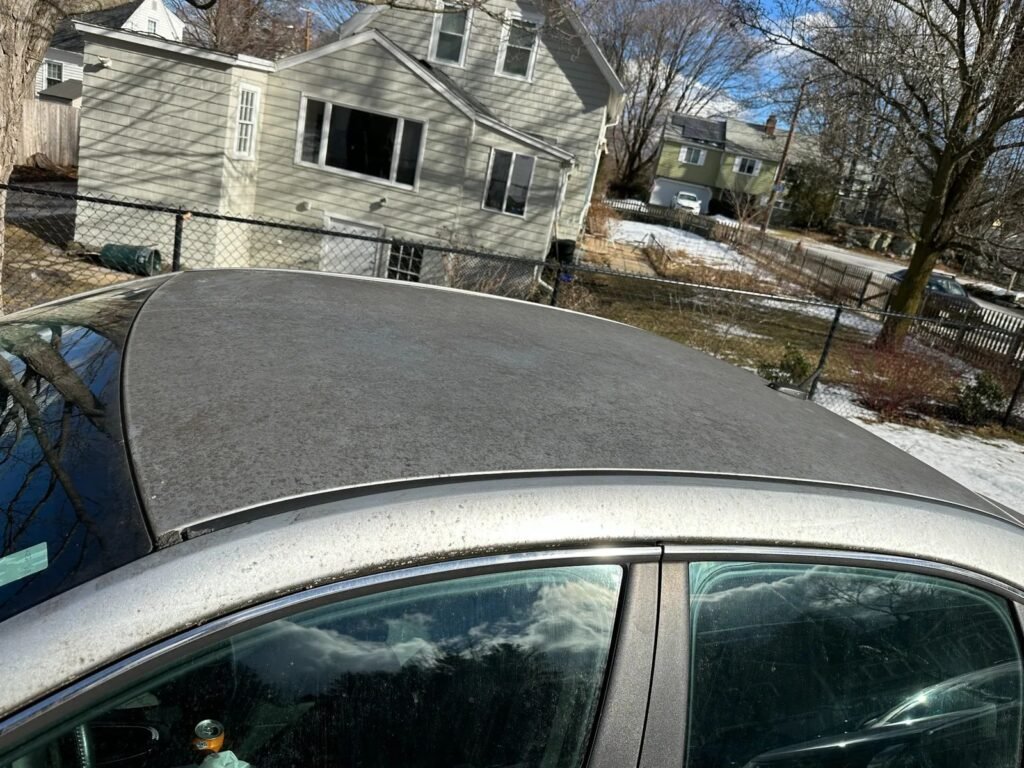
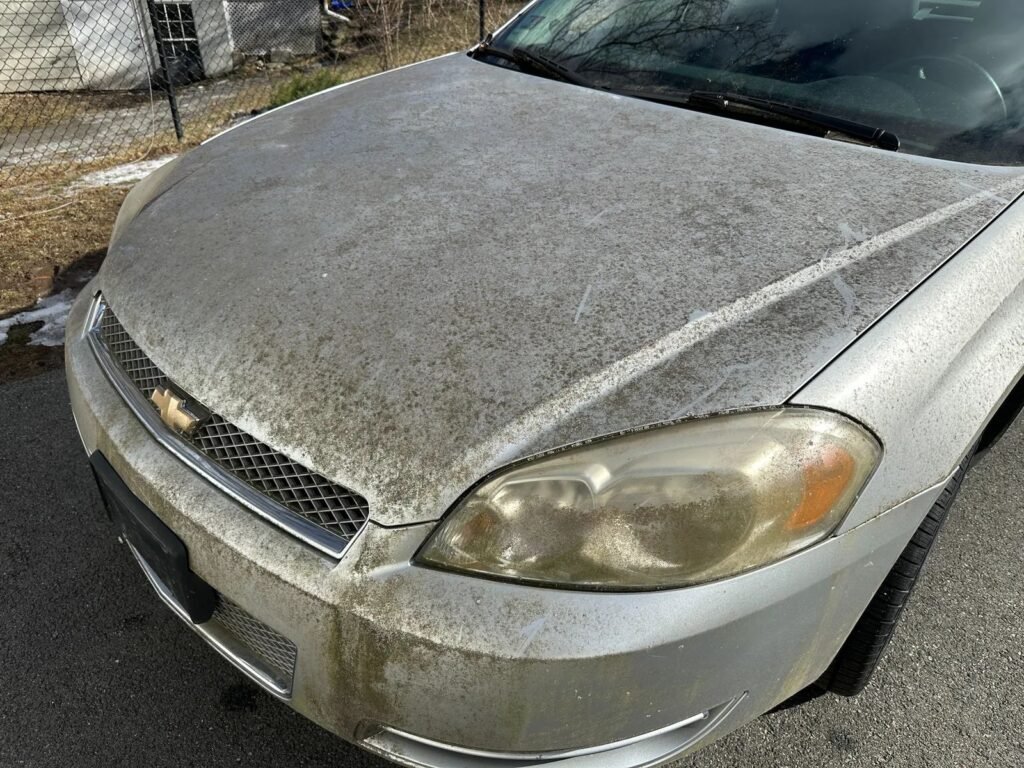
Chevy Impala detailing is more than just a wash — it’s about bringing back a legend. Few cars carry the same presence on the road as an Impala, but years of sitting outside had left this one in rough shape. Heavy dirt, moss growth, and surface contamination dulled the car’s finish and hid its true potential.
That’s where our team at TMC Detailing came in. In this two-part series, we’ll take you behind the scenes as we restore this Impala step by step. In Part 1, we focus on deep cleaning and moss removal. In Part 2, we’ll move into polishing and paint correction for the ultimate finish.
Assessing the Impala’s Condition
When the Impala first arrived, it showed:
- Moss and organic buildup across the hood and body
- Caked-on dirt and road grime
- A dull, neglected appearance that disguised the car’s true shine
This wasn’t just a car wash job — it required careful decontamination to safely remove years of buildup without damaging the paint underneath.


The Deep Cleaning & Moss Removal Process
The first stage of the Chevy Impala detailing process was focused on safely removing years of grime and moss. Organic buildup had worked its way across the hood, trunk, and seams, holding moisture against the surface. Left alone, this can stain or even damage paint, so a gentle but thorough approach was essential.
We began with a strong pre-rinse to soften the moss and break loose surface dirt. Using pH-balanced cleaners, soft detailing brushes, and microfiber towels, we carefully lifted the buildup out of panel gaps, emblems, and trim without forcing debris across the paint.
Once the surface was visibly clean, we used a clay towel to address the bonded contaminants that washing alone couldn’t remove. This step left the paint smooth to the touch and ensured no grit remained that could interfere with polishing later on.
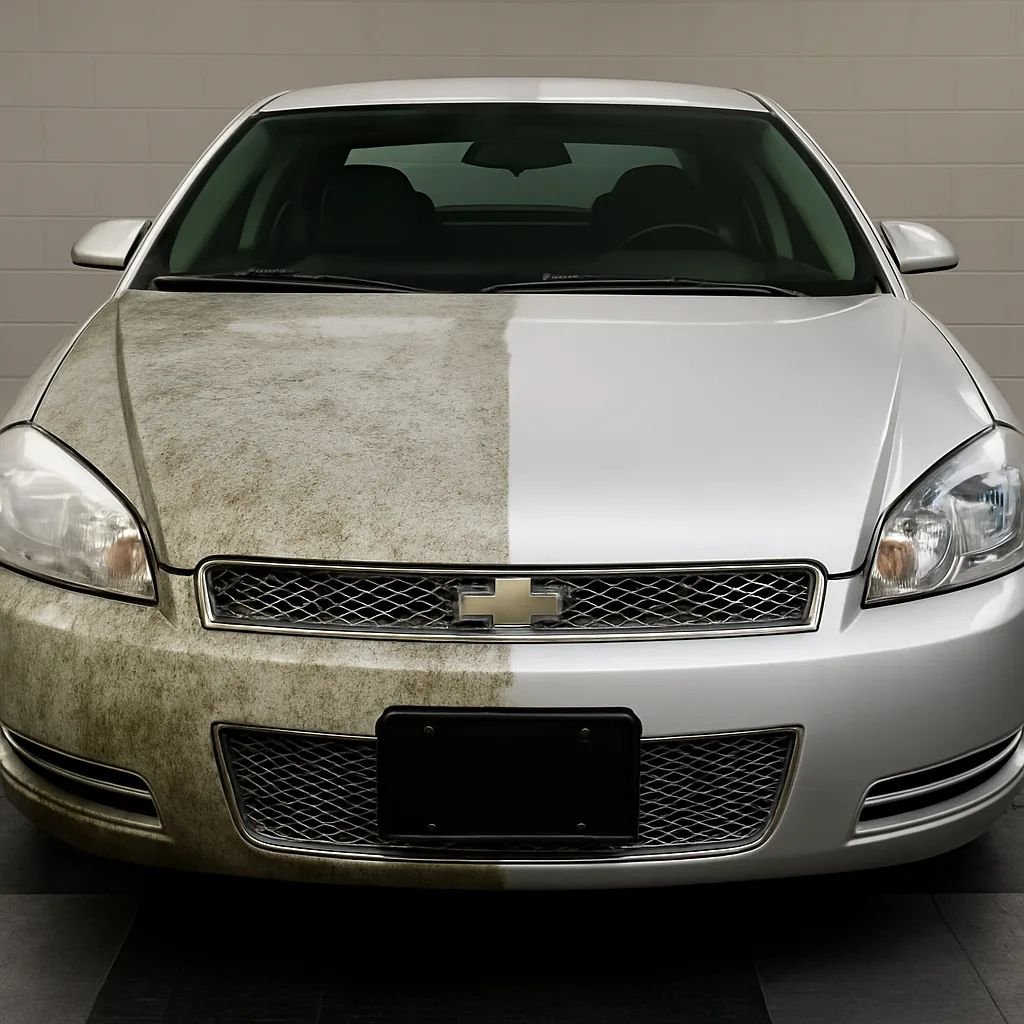
By the end of this process, the Impala’s silver finish was revealed again — clean, smooth, and finally ready for the next stage of transformation in Part 2.
Preparing for Paint Correction
The purpose of Part 1 wasn’t to perfect the paint — it was to set the stage. By removing moss, dirt, and bonded contaminants, we created a surface that’s safe for machine work in the next stage. Skipping this prep can cause serious problems: polishing pads pick up leftover debris, which can grind across the surface and leave scratches instead of correcting them.
With the Impala now clean and smooth, we had a true blank canvas to work with. This is the moment where a car begins to transition from looking “cleaned up” to being restored. In Part 2, we’ll take the freshly decontaminated paint through polishing and refinement to unlock the depth, gloss, and mirror finish the Impala deserves. This kind of preparation may seem like extra effort, but it’s what separates a quick wash from true professional detailing. Every step builds toward a finish that not only looks amazing but lasts longer too.


Wrapping Up Part 1
With moss and contaminants gone, the Impala already looked dramatically better. The silver paint was visible again, the body lines stood out, and the car had life restored to its surface. But this was just the beginning.
Stay tuned for Part 2, where we’ll focus on polishing, correcting imperfections, and refining the paint to achieve a glossy, show-stopping finish.
Ready to Transform Your Ride?
Does your car suffer from heavy dirt or moss buildup? Contact TMC Detailing today for professional exterior detailing, moss removal, and paint restoration that brings your vehicle back to life.
Learn more about our paint correction services to see how we can take your car from neglected to showroom-ready.
This Impala’s journey wasn’t finished yet. In Part 2, we moved on to polishing and paint correction to bring back depth and clarity. Read Part 2 here →
